Showing posts with label quilt along. Show all posts

Tuesday, May 28, 2013

Chubby Stars top FINALLY!

Pin It
I am both really curious, and kind of frightened to go back and see how long this WIP has been a WIP.

Chubby Stars top

I don't know if I want to look.

But I do LOVE the quilt top.  ♥  So proud that after all this time I still really love this quilt.  It's not as big as I originally intended, but it's awesome.  And will be gorgeous on the couch or my side of the bed or in the stack of quilts that Scarlet will have to choose from for her bedroom.  I'm working on the backing now and hope to finish soon! ("soon" being a very loose/relative term)

I am VERY open to quilting suggestions.  Right now I'm leaning towards all over free motion loops.

For info on making your own, go here.

P.S. My apologies for being such a terrible Quilt Along hostess.

P.P.S. I'm destashing if you want to look.  Hoping to add more listings here soon.

P.P.P.S  If you'd like to vote for the Scrappy Sprouts quilt in the Blogger's Quilt Festival, you can go here.


Chelsa also wrote a beautiful post about receiving her quilt if you'd like to read it! ♥

Monday, October 22, 2012

Treasure Boxes - Quilt Top

Pin It
So... don't know how that happened, but I thought that THIS week was two weeks from my last set of Treasure Boxes directions... it's actually been three!  Sorry about that (sheepish face).  This is harvest as I've mentioned, and it's been 7 weeks since my hubby had a day off (he had most of today off due to rain...which is a mixed blessing for sure, since they're still not done with their last field, but it was good to see him!)

Anyway -- I digress.

Our most recent installment had us piecing block quadrants in to blocks.

The charm size has twenty blocks and the fat quarter size has twelve blocks.

This week -- Arrange them all pretty-like and sew 'em together in rows.
Press seams in opposite direction when joining rows if you like nesting seams (I do).

Nothing fancy with the border... I actually figured on a 5" border for both of them.  Normally I wouldn't do that, but ironically, it feels balanced on both (to me at least -- feel free to adjust as you see best!).

Here are the directions for adding the border! (You can find a pdf here)

Treasure boxes adding borders copy

My apologies for being late.  ♥

Feel free to work ahead -- we'll be linking up finished and donated Treasure Boxes quilts for prizes from Julie at Intrepid Thread on the week of the U.S. Thanksgiving (which is the week of November 18).  So you have about a month to finish!

_________________________

Other than doing my mommy duties, I was very busy with an exciting surprise project I mentioned to you before... 

Lots of binding (which I finished thanks to this favorite new to me show)...


binding, binding, binding

But I got it finished, and had to take it out to the field to get a decent picture (which I'll show you in a couple days!)


My parents held it up for me before driving off...

Harvester and bankout


Here's a little peek.

"Cosmic" quilt sneak peek

I will sigh audibly when I get my email from Laura saying that it's in her hot little hands and up in her booth (I mailed it last week). :)

(You can see a couple of the other quilts my quilt will be hanging out with in Houston on Laura's blog.)


Friday, October 19, 2012

"Pickledishing"

Pin It
First business -- SewLindaAnn -- you are the winner of Natalia's new book!  I'll try to shoot you an email, or you can contact me. :)

Now -- my post --

This is, I think, my favorite quilty-type photo I've ever taken.  I love it so much -- it's even up there in my header.

2 blocks done

Maybe it's because of the subject -- but the colors, the shapes, the scrappiness, the lighting -- it all makes me happy.  The only downside is the WHEN the picture was taken -- in January of 2011, and blogged about way back then...

This year -- more than 1 1/2 years later -- I wanted a fall quilt.

I thought about starting a new project, but some good friends advised me to finish up something I already started (they know me well enough to know I have plenty of WIPS lying about).

So this weekend, while my big Cosmos quilt was at the long-armer, I finished piecing the arcs.

arcs, arcs, and more arcs

And added three more blocks to what I already had.

Basted.

Pickledishing

And quilting has commenced.

quilting commences

Seriously though -- this quilt makes me so happy I want to sing songs to it.  Can't wait to show it all finished up!

If you want to make one of your own -- Aneela has the Quilt Along details here.

Until later... ♥

Saturday, September 29, 2012

Treasure Boxes Quilt Along - piecing

Pin It
Sorry they weren't up yesterday... but here you go! :)

Piecing instructions for the Treasure Boxes Quilt Along. :)
See previous posts here.

treasure boxes piecing directions copy

Get a pdf copy of these directions here.

After step 1, you do not have to trim your HST's to make your design work, but if you'd like to trim them to 8 1/2" square (unfinished), then they will be perfectly perfect. :)

Make 12 blocks for the larger size (cut from fat quarters).
Make 20 blocks for the charm size!

Don't forget to add your photos to the flickr group!  (You can see Michelle was a bit of an over-achiever). :)

You have 2 weeks to make your blocks!  We'll be linking up the week of the U.S.Thanksgiving with finished/donated quilts  for a chance to win fabulous prizes from Julie at The Intrepid Thread! :)

P.S. I'm doing a pattern giveaway over on facebook because we hit 100 "likes!" :)
Go tell me which pattern you'd like to win, and I'll pick a winner on Monday. :)


Friday, September 21, 2012

Treasure Boxes - cutting

Pin It
It's still Friday where I am!

What a week!

Harvest started this week... 'nuff said.  Good news is that it's the last crazy/busy season of the year, so I just have to make it until a little in to November.

Here are the cutting instructions for the Treasure Boxes Quilt Along.
This is our "assignment" for this week. :)  Add your pictures of your fabric!

treasure boxes cutting instructions copy

Here is a pdf of the cutting instructions.
*Please note: you can cut your squares at 8 7/8" instead of 9" if you prefer not to trim when done.

I hope these directions are pretty clear!  When I'm done with the Quilt along posts, I'm going to compile the graphics/pages in to a pattern that will be for sale with all proceeds to benefit Quilt Hope In.  So if you think you might want this pattern -- save/copy the file now. :)

And so this post isn't left without a pretty picture --

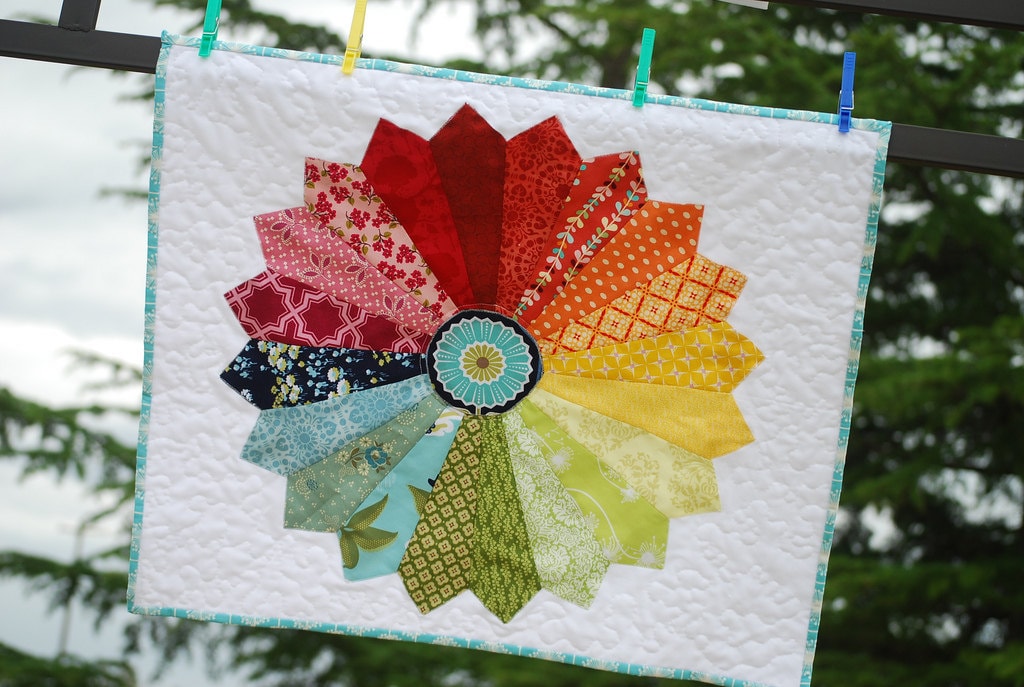
The little etsy shop Quilt Hope In had its first sale since re-opening.  I listed this little color wheel dresden I made; it sold and shipped off this week. yea!

If you would like to list something, email me with pictures, the price and all that jazz.  The payment goes directly to Heartline, so if you need compensation for shipping, please make sure to let me know, so an arrangement can be made with the buyer aside from their payment.


Anyway -- I gotta go to bed.

Much love to you all.

And I'm praying I adjust to the hubs working a lot again soon... quality time is my main love language, and I miss that big hunk... *sigh*  At least I'm not 37+ weeks pregnant or caring for a newborn this year... so there's that...

Tuesday, September 11, 2012

Treasure Boxes Quilt Along - fabric requirements

Pin It
yea!  We're ready to get started with the Treasure Boxes Quilt along! :)

Treasure Boxes Quilt Along

Julie at The Intrepid Thread has put together a wonderful deal for any one who wants to quilt along!

The pattern and instruction will be here, and posted here.  I'll get cutting instructions up next week. :)

Fabric Requirements:
For a 64" x 82" quilt, you will need:
- 12 fat quarters
- 3 yards background and border (I used white here)
- 1/2 yard binding
- 5 yards backing

I will be using Out to Sea for my quilt, but this design is incredibly versatile, and will be beautiful in a number of designs -- all you want to keep in mind is good contrast between the diamonds and the prints.  You can achieve that contrast with a solid vs. print, value difference, or color distinction (warm vs. cool).  I'm going with white.  Because I like it...

Here's the great part... you get to pick your fabric for the kit Julie put together!  She's giving us 20% off her already reduced prices. :)
So exciting... I know!...
(and yes, I am tempted to buy another kit... just because....)

Some links to my favorites--
Bella
Chicopee
Field Study
Coquette (with charm pack)
Madrona Road

What you need to do -- pick your 12 fat quarters (you can go from one collection, or mix and match), let her know what yardage you'd like as your background/contrast and border print (3 yards), and choose a binding( 1/2 yard).  Then Julie will wrap it up all

Here is the first little quilt I did with this design, in which I used a monochromatic palette of saturated pinks and reds...

pink baby quilt

If you would like to make this quilt with charm squares instead of fat quarters (smaller blocks), then here are the fabric requirements:

46" x 55"

60 charm squares (2 charm packs)
1 1/2 yd. background
1/2 yd. binding

Here is a mock-up of the quilt done with Ladies Stitching Club (I have a charm pack of this fabric -- it's even prettier in real life)

Treasure boxes charm size

A last word on how this Quilt Along is working -- 

A long time ago, I opened a little etsy shop called Quilt Hope In.  The money for things we made that sold went directly to a birthing center and sewing education center in Haiti run by an organization called Heartline.  When I was pregnant, I let it lapse, and I'm thinking it was such a good idea that it's time to re-open it.
I'll be accepting donations -- email me if you've got a high quality hand-made item you'd like me to list.

When I'm finished with this Treasure Boxes quilt, it will go up for sale in the Quilt Hope In etsy shop.  And y'all can donate yours there too.  Or to another great organization.  And no quilty police are going to come get you if you decide to keep your quilt... BUT...

We'll have a link up when we're done, to show off our quilts, and remind ourselves to store up our treasures where it matters... and not just in our fabric stash. ♥

But you know that Julie... she's offering up three amazing prizes for those who finish and donate a quilt! She says "they'll be something good," (which if you've seen her giveaways, you know that's saying something!)  We're thinking about 2 months as a time-frame; I'll give you an exact date with next week's cutting directions.

OK -- the kiddos just went to bed, and it's time to go hang out with the hubs or get some sewing done, or veg out to the new fall shows. :)

Important links
-- Our button is over in the sidebar... I hope I got the code right!  (html is not my native language)

Treasure Boxes Quilt Along button

___________________

My WIP report -

Cutting -
- Treasure Boxes
- Beauty is You baby quilt

Piecing -
- Chubby Stars (all I have left is the border!)
- Glassy quilt
- new design

Quilting -
- Hello Luscious baby
- Baby S
and more!

Linking to Lee's!

WIP Wednesday at Freshly Pieced


Monday, July 23, 2012

better late...

Pin It ...than never!

I pulled out my Chubby Stars this weekend, and got a few blocks made!

I've changed my original plan (since I have a quilt for my bed now, and the chain/X blocks are SO tedious to make), and it should be done soon!  It'll look great on the couch too. :)

chubby stars progress


My motivation --
Next month I'll be starting a new quilt along, and it was just shameful to not have the other one done. :)

Here's a peek...
It was inspired by this little quilt, but I sized up the blocks.  (I'll have instructions for both the small and larger blocks).
Now I just have to wait until Julie @ Intrepid Thread gets her Out to Sea in... This block is MUCH simpler than the Chubby Stars, and I'm so excited to make -- and donate -- this quilt!

Treasure Boxes Quilt Along

Details coming soon...


Thursday, March 22, 2012

Giving away French Kisses (my first pattern!)

Pin It Giveaway is closed, but you can still comment if you'd like. :)
_____________

In my ongoing effort to make quilting sustainable, I give you my first pattern, French Kisses -- all published and ready to go!

French Kisses quilt

And I feel really grateful...

Grateful I will no longer be agonizing over how to design the cover (which I hope you like)


Or grateful I'm not sitting at the computer editing...


Or grateful I'm not still trying to figure out EQ7 and come up with cute virtual quilt options (like this one in Vintage Modern)...

Vintage Modern mock-up

You know, it's just exciting to be "done."


This quilt measures 64" x 80" -- so it makes a good twin or big throw size.  You can see that it very nicely covers my tall husband while he snoozes on the couch.

The design is a result of day-dreaming while Scarlet was eating, and we were the only two awake in the house.  It dawned on me that two of my favorite block designs could interact nicely.  Rouenneries Deux had yet to be released at the time, but I thought it might be a good design to justify adding to my French General stash.

French Kisses with love birds 

I already had some Secret Garden stashed, so I made some test blocks (and then kept going) until I had enough blocks to make a quilt for our bed (this one is actually on its way back to me now from Lindsay, and I can't wait to see it -- and sleep under it)

French kisses in {the} Secret Garden

"The hubs" got me a FQ bundle of Rouenneries Deux for Christmas, and as soon as the yardage was released, I went about to finishing this quilt.  

French Kisses quilting

Lindsay of Eileen quilts did the long-arm quilting for me, and it is so beautiful; I love the big roses all over.

________________________________

I have made this quilt design twice now, and my friend Kelly tested it for me.  The blocks are big, come together quickly (remember I made both of these with a newborn not yet sleeping through the night... which she's still not doing, but she's cute nonetheless), and have lots of movement.  It's also got a great spot for fussy cutting or big focal prints (though you might need to figure in extra fabric, depending on how you cut it).

This one was made by Kelly at KelbySews
You'll notice in Kelly's quilt (which uses a layer cake of "It's a Hoot" by Momo for Moda), that she used the light gray as her solid.  When you're using a layer cake, you'll want to choose your background fabric to contrast, even a little, all the prints.  Because "It's a Hoot" has the white prints, the gray worked well.

Stained Glass French Kisses by Kelly at KelbySews


So if you like it, and want me to do your math for you, or just need a way to use up an extra layer cake or fat quarter bundle (yes, fat eighths should work fine, but I didn't create explicit directions for them) you have, then I'd love for you to buy my first pattern.


There are directions for using either a layer cake or fat quarters, and I've included a bonus layer cake pattern (called "Just Hugs"), because hey, we all love a bonus (and it was a cool design).  

The pattern is a pdf file that will be emailed to you immediately after purchase, and includes detailed and diagrammed instructions for how to cut and construct your own.  I did not write up the directions for the larger size, but if you'd like to join our quilt along, I'd be happy to help you with the math for adding blocks (you would pretty much just double the fabric if making the size I made in Secret Garden pictured above). 

To celebrate and launch my new pattern, I'm also giving away this layer cake of Rouenneries Deux, along with a copy of the pattern (and I'll probably give away another copy of the pattern too).  


To enter the giveaway:
- Leave me a nice comment {can be about the pattern, how to potty train an almost three year old boy who is as (cute and) stubborn as his father, how cute Scarlet is, how cute I am, how your day is going, whatever}.
- Pin, Blog, or Facebook with a link to my pattern for a second entry and leave a comment telling me so.

 I do hope to have this as a paper pattern, but honestly don't understand all the goings of getting a paper pattern published yet, but I'm learning!

Thank you, and I hope you all like French Kisses. 
♥ ♥ ♥

P.S. -- If you buy it and then win, I'll refund your purchase. :)

Linking to AmandaJean's Finish it up Friday.

Monday, February 27, 2012

well phooey...

Pin It The UPS man had this for me today...

But sadly the laundry and dishes fairy didn't visit our house this weekend, so it will have to just sit there looking pretty.

Vintage Modern

This is the fabric for my next quilt pattern.  I've had the design all worked up in my head (another one I dreamt up while nursing Scarlet in the wee hours of the morning) and on EQ for a while, and I am really excited to see it actualized in fabric.

Speaking of things looking pretty... here is Miss Scarlet in her new hat.

Scarlet's new hat

Perfect.

My friend Jen made it... we're doing a little trade; I'm making her daughter a quilt, and she's making my kiddos little hats.  I know how to crochet blankets (or I used to at least), but nothing fancy like this.  I REALLY want to learn to knit... anyone know a good "teach yourself to knit" resource?


And thank you for all the encouragement with the coming very soon French Kisses pattern. :)  It's nearly complete!  I just have the finishing directions to add... oh, and it'd probably be good to get the quilt back from Lindsay (at Eileen Quilts) and take a pretty cover photo.  I'm trying to think of Parisian places I can take it to... I'll have to keep thinking.

Sharon from Lilabelle Lane was so sweet to ask her husband to make me a quilt along button...

It's in the sidebar, but feel free to grab one!

Tracey Jay Quilts

Fabric requirements again:

10 light fat quarters as background (+ one quarter yard for border pieces)
10 medium/dark fat quarters

-- OR --

2 5/8 background yardage (includes border pieces)
and a layer cake or 10 medium/dark fat quarters

2 1/2 yds for the outer border (if you want to miter your corners)
5/8 yd. binding (cut at 2 1/4")
5 yds backing (will be more than enough to create the extra needed to send it to a long-armer if you'd like -- I used some extra fat quarters for my backing + 3 yds I believe)

Monday, February 7, 2011

all work and no play...

Pin It ...makes Tracey a grumpy dull girl...

It's true.  Since I went back to work a couple weeks ago, even if it is only three days/week, sewing has slowed way down. :(

BUT, I did manage to get a few more of my pickledish blocks from Aneela's quilt along.

This quilt is so hard to capture with pictures.  But it will absolutely be my favorite one ever.


pickledish project

This quilt will be king-sized.  I think the plan is to make it 4 blocks x 5 blocks, with this as the border.  Or I might bite the bullet and make it 5x5.  Though I like the idea of having 14, rather than 19 more blocks to go. :)

-------------
I'd like to add a couple notes for those who might be scared of this block...

The only curves I pin, are when I join the two arcs together to form "the eye"

"the eye"

I want the corners to match up perfectly, and so I pin.  Sometimes I pin the very last joining piece too, but other than that, these come together quite nicely sans the little pokey sticks.

Wednesday, January 19, 2011

WIP Wednesday -- two quilt alongs now. :)

Pin It Yep, that's right.  I'm now in the thick of not one, but two quilt alongs. :)

First up --

Cara's Urban Lattice.

This is going to be Jay's manly quilt... and fittingly, Jay stayed up late with my Sunday night to finish all forty-eight blocks.  I finished at 11:57.

I tried to get up before S on Monday morning to lay them all out, and I did beat him, but not by enough time.  So I finished the lay-out during his nap, and got half of them sewn together that evening.

Urban Lattice WIP

I am proud to report that making the blocks without paper piecing still resulted in perfectly aligned points.

_______________________________

Next up -- Aneela's "Pickledish" quilt along.

(I have heard that this isn't technically a pickledish block, but a modified wedding ring -- I'm not an expert, but I thought you might be interested in that little tidbit)

These are my latest obsession.  I would sew these all day (and night) if I could.

You saw the last two...

"Pickledish" blocks

...and then there were three.

____________________________

In good news -- 
I got a finish this week! (show you Friday).

But I'm starting a new one (for my niece due to arrive sometime around March 1)

Sunkissed stack

I love this Pink Lemonade look. :)

I'm linking this in to Lee's WIP Wednesday!  Go see who else is playing. :)

WIP Wednesday at Freshly Pieced

Saturday, January 15, 2011

Sunday's fabric -- "in a dish"

Pin It
(yea, I'm posting "Sunday's fabric a little early.)


I'm going to give you all a little insight in to the conversations at our house these days...


"Oh honey... we should go to Disneyland in February, so that we can get our $50 breakfasts." *


*We went to D-land for part of our honeymoon, and stayed in the Grand California Hotel, and ate at their buffet EVERY morning we were there, and still talk about it all the time.


"Oh... that sounds too good!  You know I'm having a hard time here... why are you talking about French Toast, and syrup, and juice!?!"


------------
Take 2:


"Honey, guess what I want?"


"Sugar."


"yep."


_________________________________

Jay had made a resolution to go on a diet this year.  I still haven't lost the Steiger weight, and think it would be a good idea to finally make a real effort before I add weight with #2 (which we're still working on).  He's doing low-carb; I'm doing reduced-carb/no sugar.

We both miss sugar.  

In good news though, he's lost 6 pounds, and I've lost 4... and sugar really isn't good for us anyway, so I think we'll keep going for now.

Oh, let me get to my point. 

Though I have the ability to have many different projects going at once, I can only do one diet at a time.  And for now, it's the food variety.  (And I had some Christmas money).

These came in the mail this week (from Hawthorne Threads).

diet??? what diet?

So I added some of my own to the pile...

"pickledish" fabric

...and got busy sewing with Aneela.

Button


laying out the arcs

At this point, I had every intention of using ivory as my background, but this Moda Bella solid in Medium gray looked better. (I love this gray; I don't know if you can tell in the pictures, but it's a warm gray, and very pretty... I used it in Jay's quilt too.)

"the eye"
(I even did some of those curves without pins!). ;)

I made my first block.

First block

And then I made my second.

2 blocks done

And then I took them outside to so they'd have a proper picture.

2 blocks done

10 to go!

Use the link above for all the information on making your own.  I used freezer paper for my templates, and it worked great.  :)

Thank you Aneela for a gorgeous design!

And Happy Dieting all... whatever form you have chosen. :)


LinkWithin

Related Posts with Thumbnails