Showing posts with label Go cutter. Show all posts

Monday, March 12, 2012

Breakfast at Tiffany's finished quilt - and 5 months big

Pin It Pin It


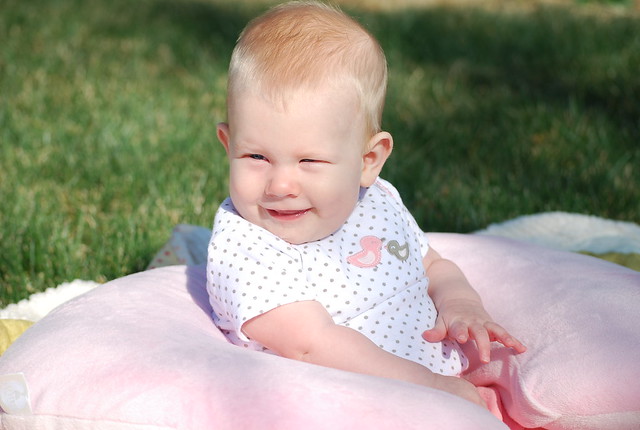
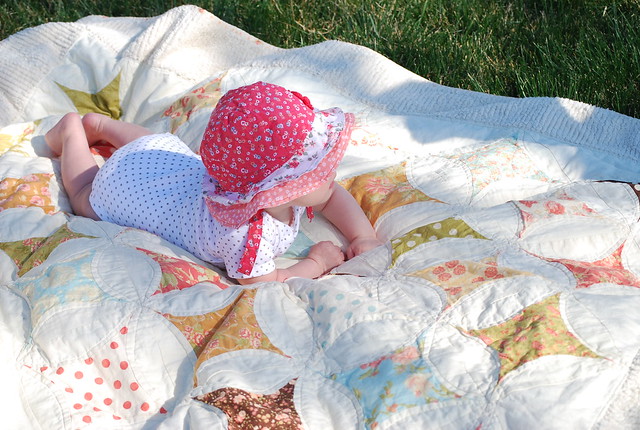
My Scarlet turned 5 months old last week.
And I'm taking the opportunity to tell about her, and finally blog about a quilt I finished back in January.
baby girl

I was making Steiger a big boy bed quilt for Christmas (which I still need to blog about), and decided Scarlet needed a quilt for Christmas too.  I had this one basted for over a year, and because I was still on the feeding every 3 hours around the clock schedule with Scarlet, I decided an almost done quilt was the perfect one to finish. :)

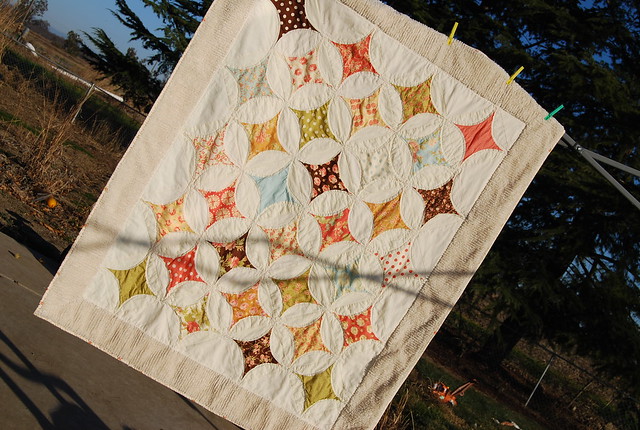
Breakfast at Tiffany's finished quilt

I made this quilt by using the "Rob Peter to Pay Paul" die on my Go! Cutter.  (You can read my full review here), and I love this die and design -- but will change a few things when I use it again.  Because I don't pin these curves, all the bias edges stretched a little, and it was difficult to get it to lie truly flat.  I solved this by minimal quilting (just followed the line of the petal shape), but would have done little petals in the print pieces too if I had a smoother surface (maybe spray basting would help this?)  I will make sure to starch the pieces before cutting next time -- I'm thinking that might get things a little more flat.

The back is pretty flowers.

Back of Breakfast at Tiffany's Quilt

It's a beautiful quilt though, and getting a lot of use.  I LOVE the chenille border (and not just because it makes sewing the binding on really easy -- the stitches disappear in to the chenille, so a machine sewn binding is still so pretty).
Breakfast at Tiffany's finished quilt

Now about my little Miss.

5 months big

We took you to the doctor last week Scarlet, and you are 15 lbs, 2 oz, and 26 1/4" tall.  You are actually in the 90th percentile for height, and even though I am only 5 feet tall, because 100% of your nutrition has come from and through me, I'm taking the credit... (it's the last time I'll be able to do so, since you'll be starting solids soon, and every one will think it's your tall dad that has made you tall). ;)

little hands

It's hard to write about your traits without comparing you to your big brother, but you two are definitely different... but you hold your hands the same way he did.  

He is one of your favorite people.  
This was your face when you saw him run over to you while you were lying on your quilt.
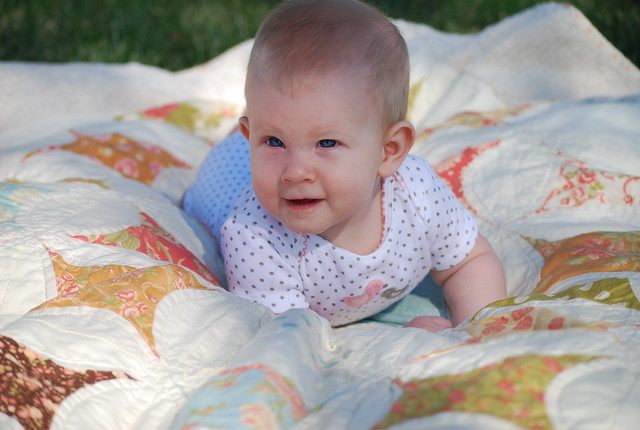
Hi big brother!

For about a month, you were only waking up once in a twelve hour night, and Mommy was loving it -- but either your ability to roll around (you're a tummy sleeper, like your brother was), or your increased activity, or growth spurt or little teeth popping in, or something has you up more often lately.  I don't mind as long as you fall back to sleep (which you did last night... thank you baby).  You're a thumb sucker too, which I suspect is part of why you used to scream when swaddled... when you were born, you had one hand by your face... I'd guess you've been sucking your thumb for quite some time. ;)

You like me to sing you to sleep.

You will sit and watch for a long time, and be happy about it.
5 months big
(I love your squishy little tummy baby girl)

You really are an "easy" baby.  And oh so charming.  You use as few words as possible, and really only cry when you're wanting out of your car-seat, or Mommy kept you up too long, and you got overly tired.  You usually ask to be held about fifteen minutes before you're ready for your next nap.  You spend a lot of time in your pack in between, and even let Mommy do dishes or shower while you're awake (a luxury your brother never afforded me).

You love your nightly massages, and stretch your little legs as long as you can, and smile and coo.
You watch us move around the room, and flirt with whoever isn't paying attention to you by smiling at them.  Because I'm usually studying you, I tell those people that you are smiling at them so they'll return the favor.

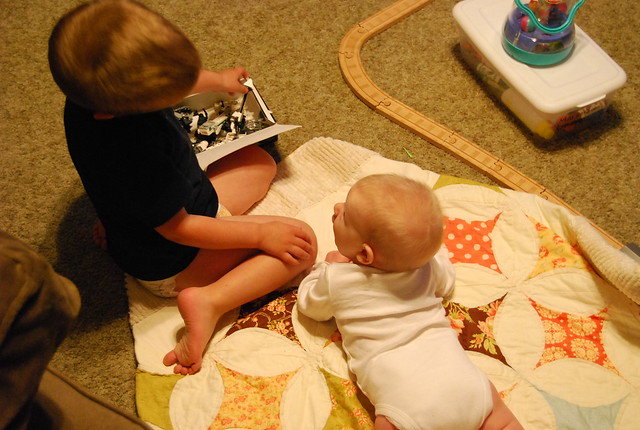
You and Steiger play together all the time.
sibling love

You roll on to your back easily, but have trouble getting back to your tummy.  Sometimes Steiger will help you get back around, and you don't mind.  The other morning, he was holding you on the couch while the two of you were watching Curious George, and when Mommy brought the laundry back out, he had laid you down and was snuggling next to you.  Thank goodness he put you to the inside.  He loves you as much as you love him.  ♥  I'm hoping to do everything I can to keep it that way.

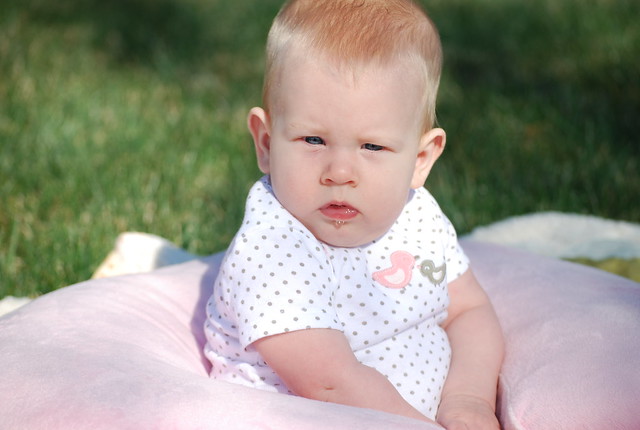
Your eyes are blue and you are definitely a fair little white girl.

I am 5 months big

We hope you keep your blue eyes; everyone tells you how pretty they are.

You are unassuming, watchful, charming, and curious... and have seamlessly welded yourself in to our lives.  And oh how we love you for it.

(linking to Megan's Sew Modern Monday and Quilt Story's Fabric Tuesday)

(and if you're curious, there's a picture of Steiger when he was about the same age in this post.)



Wednesday, December 8, 2010

wanna Go!?! -- closed

Pin It Just in time for the holidays. :)

Win an AccuQuilt Go! cutter. (and three of your favorite dies). :)
Q and A:
If you have a question -- please post it in the comments, and over the course of the giveaway, I'll post the answer here. 

-Question from Peris -- The accuquilt looks really cool but how do you store it...does it come in a bag or box...limited space means storage questions???

Peris -- It measures about 12" x 16" x 5" (with a little extra for the handle) when it's all folded up.  Mine is tucked next to my desk, and doesn't take up much room at all!  The top stays up with strong magnets, so it's secure, but easy to open -- like in the photo above -- when you need it. 

Here it is all closed up (next to the Go! Baby)


Someone asked me about the Go! Baby as well -- 
Yes, I've seen it, but I'd personally prefer the regular size Go! because it can use the wider dies (like the Rob Peter to Pay Paul, which I really love)... If you can't wait for a good sale, and if the cost of the full size is prohibitive, then the Baby is a great option.  Also, if you don't see yourself using the bigger dies -- then go for it! 

Calico Cat asked about wasted fabric -- 

I do have a question about the GO! - is there a lot of wasted fabric when you use it? The last thing I need is more snips and scraps of tiny fabric pieces, LOL - I'll feel obligated to keep them for "someday" or "just in case"!

Personally, I don't think the waste is much more than it would be cutting shapes yourself.  Irregular shapes will always have more waste, and that is no exception with the Go! cutter.  There is little waste with the geometric shapes (strips and squares) -- well, as much waste as you want there to be (based on how much overlap you make)

I don't feel bad throwing away irregularly shaped scraps, or anything smaller than 1 1/2" in width.


Here are my background posts and full reviews of the different dies I tried.

BUT -- to summarize:
- this product is really, truly easy to use -- sturdy and convenient
- makes piecing with tricky shapes much more manageable
- a nice tool to add to your quilty notions and gadgets
- would be a great investment if you make custom quilts or a lot of quilts
- If you can't afford it, it would be a great item for a wish list if your parents/rich great aunt/in-laws/fabulous sibling want to get you something, or if you find it on sale (they were just recently $200 at JoAnn's -- a great deal!)

I had wondered about a couple things from my experience, and I got a response from AccuQuilt directly: 
- When using the rag quilt die, you will probably want to have an extra 10" cutting mat, because it is very hard on them.
- Also when using the rag die, watch for the little blades to pop up, and just make sure you pop them back in.  If they don't pop back in -- call Accuquilt for help/replacement.


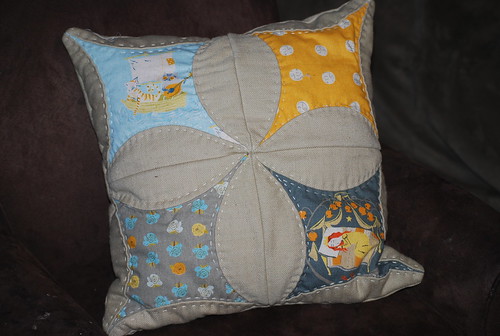
My personal favorite die I've used is the Rob Peter to Pay Paul.  I just finished a pillow using that die this week in fact. 
Modern Swappers pillow

The quilt top I made with this die (using a layer cake) is bordered, basted, and waiting for the holidays to be finished and donated

Breakfast at Tiffany's quilt top

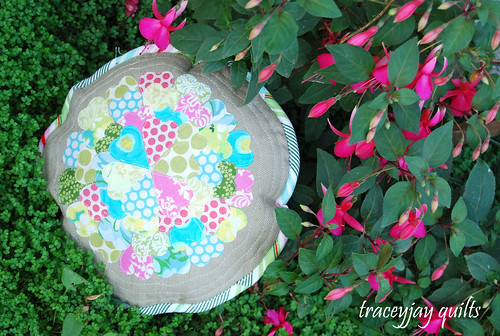
I also really enjoyed making this little pillow -- made with the round flower appliqué die (tutorial here) -- which now resides happily in a baby girl's room. 

pretty little pillow

The next one I want to get my hands on is the Double Wedding Ring.

______________________________________________________________

Now for the giveaway!

To enter:
(separate comment for each please--and make sure I can get a hold of you!)

1) Leave a comment -- it can be a question, a cute little note, a boring little note -- author's choice for this one. ;)

2) Become a follower of traceyjay quilts (or tell me if you already are)

3) Be or become a follower of Quilt Hope In (the blog of our coming soon charity etsy shop)

4) Blog about Quilt Hope In and this giveaway... (yes, that is two things you must blog about for entry #4) -- don't forget to leave me a link!

So, you each get four chances.  I am going to have an outside party pick a winner via random.org next week (Monday, December 13)... 

Sunday, October 10, 2010

Go! in strips and rags

Pin It *ALERT: If I saw you on the day you gave birth to your second born, go directly to the little x in the top corner of this window, and click it... yes, that means you Mom.  You too Jamie.*

___________________________________________

The final installment of my Go! mini reviews, before the giveaway (sorry, I'm a day behind)...

In case you've missed anything:
- A few notes on using the die that comes with the cutter
- "Rob Peter to Pay Paul" (you know, I have a minor in Biblical studies, and I still don't know the origins of this expression)

Please leave your Go! related questions in the comments, and I will address them with the giveaway.  I am waiting on an answer for a couple questions I had myself (I sent Friday, so I expect to hear back tomorrow).

_______________________________________________

I have the 2 1/2" Strip cutter, (there are other strip cutter options; this one is apparently the most popular though).

First, the technical stuff:

It cuts three strips wide, up to six layers of fabric at a time.  If you're cutting with the width of fabric, you can get nine 2 1/2" strips each rotation.  

DSC_1306

DSC_1307

This die is nice and long, and does allow you to get the full length of fabric folded in half (or one fat quarter) on there, even without cutting off the selvage edge (though a couple times I did miss part and ended up with this effect).  

trying out the strip cutter

Not a big deal really, and easily fixed with a quick snip.

It does cut beautifully even strips which I used in this little custom quilt I'm working on, but I still wasn't sold on it.

DSC_1311

I have this stack of fabric which will be turning in to a Christmas gift.


I plan to use one of the designs from Camille's new book that calls for 2 1/2" strips.  


So I pulled out my cutter again.

Sure, it cuts great strips, but *meh*


Now here's what I like about this die:
  • accommodates the full length of fabric
  • beautiful, even cuts
What I don't really like:
  • I found it much more difficult to crank through than the other dies
  • If you don't have your fabric cut to the right size before hand, you can get more waste than I like (there is 7 1/2" of usable fabric there when done)
  • I got some creases in my strips that weren't there when I laid it on the die...because yes, I ironed first.

All in all, I'm not wild about this die, because even though it works, it doesn't seem to save me much time.  My ruler does slip on occasion, yes, but I can whip out 2 1/2" strips pretty easily.  I think I would love this if it cranked through easier, but I found myself worrying I'd get a sore elbow or wrist.  I went back to my rotary cutter for the rest of the cutting for this quilt.  I wish I had this die instead.

_________________________________________________________

The last die I have used is the Rag Quilt in the 8 1/2" size (the blocks finish at 6 1/2")

This is part of the stack of fabrics getting ragged up as a gift.  You see, rag quilts aren't really my thing, and neither are these colors... but alas, that's what love is all about... sewing with what feels like men's leisure suits, if the heart of the recipient so desires.

These are actually very nice wools from Moda and Benartex...not men's leisure suits.

Here are some of our completed squares.  :)

I apologize I don't have any actions shots of this, but here's my quick review:

What I like about this die:
  • It will save me from a carpal tunnel flare up (I'm not lying)
  • It fringes even this very heavy, thick fabric well
What I don't like about this die:


  • We had some trouble with the wool getting caught in the blade intersections.  It was hard to pick out even with the pick the cutter comes with (I don't think other fabrics would have had this reaction to the same degree, but I apologize I didn't try any others out).


  • The little tiny blades were popping up after a few cuts.  My sister-in-law actually cut her finger brushing the die off, because the blades were higher than the surface of the foam.  They popped back down if I pressed on them with my scissors (not my nice scissors; don't worry), but it was odd.  (This is one of the questions I am waiting to hear back on).
My personal bottom line:
If you're in to rag quilts -- get this die.  I can only imagine snipping all those shaggy edges.  Yikes, I say.
I'd get the smaller one to go with this if I made rag quilts.

Next Go! post -- a giveaway with Q & A! :)

Thanks for reading!


Thursday, October 7, 2010

Go! Rob Peter to Pay Paul

Pin It *This is part of my mini-series of Go! cutter reviews.  So now, here is my review of "Rob Peter to Pay Paul".  I plan to review the Strip cutter die, a rag die, and hope to have the giveaway ready to begin on Saturday or Sunday!  Please leave your questions in the comments, and I will answer all I can in the "Giveaway with a Q & A" post*

Breakfast at Tiffany's quilt top

When I set about the task of picking out my three dies to go with the Go! cutter, I knew immediately I wanted this one: the "Rob Peter to Pay Paul"

I love curves in quilts.  I love petals.  I love cathedrals.  This design has all those elements in it.

_________________________________________________

I tried a couple different materials with this die set: 
  • Standard quilting cotton by Moda (Breakfast at Tiffany's with Bella Snow to be exact)
  • Canvas weight Far Far Away 2 by Heather Ross
  • Heavy linen from French General for Moda
The logistics:

For the regular quilting weight, I used a layer cake.  This die is sized to work with the 10" x 10" mat, and in case you weren't aware, layer cakes are a 10" square.  

The Go! can cut up to six layers of regular weight at a time, but I found I preferred to crank through four or five.

Rob Peter to Pay Paul

Rob Peter to Pay Paul

With a layer-cake square, you do end up with some waste for this die (P.S. If you want my "left-overs, leave a comment and I'll send them to someone").

Rob Peter to Pay Paul

But because of the shape of the curves, the waste is kind of necessary, and would be about the same if you were cutting them by hand.  You can get away with an 81/2" to 9" square if you're not using a layer cake.

Rob Peter to Pay Paul

This die is actually a set of two:  the center-pieces and the petals.  The petals are split in half so that you do not have bias edges.

I used a 5" x 10" piece of fabric, and it worked beautifully.  Getting six layers through with this die was not a problem at all.

Rob Peter to Pay Paul

As for sewing them together.

Cutting was easy; however, the directions that come with the die say to pin.

Breakfast at Tiffany's

I don't pin unless it's an intersection.

I made about 2 blocks with the pinning method.  AND. I. HATED. IT.

I was heartbroken thinking I might not like or use my beautiful die.

Then I decided to try this method which I have used before for curves.  And it worked!  And suddenly, I loved them again.  The die is set up so there's a scant 1/4" off-set, so I did start it with the pointy part of the petal up almost 1/4".  The little notches lined up almost every time.

DSC_1320

_____________________________________________________

What I like about this die:
  • the shape is wonderful
  • easy construction (if you don't use pins)
  • easy to cut
  • beautiful design (I think I already said that)
  • Works well straight or on-point
  • Had no problems whatsoever cutting through the heavy linen (I had it 4 deep)
What I don't like about this die:
  • Working with all those bias edges can get a bit stretchy (I recommend starching your pieces first)
  • The intersections when joining rows are really bulky  (I didn't lose any needles, but my machine kept wanting to eat the under-sides, and I sometimes had to lift the presser foot to get it to move through)
  • Sort of a plus and a minus -- the split on the petal, while making things easier, means it is more difficult to use a reverse of the design and put the print on the petals.
  • It was hard on my cutting mat -- and nearly split it in one spot (which I shall ask accuquilt, but I don't think that's supposed to happen)
  • the cost is prohibitive for some of us
But I think I'll be making a lot more quilts with this die.  I really do like it.

FFA 2 - Rob Peter to Pay Paul

Oh, PS -- For the Breakfast at Tiffany's quilt, I can't decide whether I should do a chenille border (like with this quilt) or go with some of this print.  


Don't forget to leave your Questions!

And if you're looking for what I did with the round flower appliqué die, then you can see it here. :)

Saturday, October 2, 2010

Go! baby...

Pin It AccuQuilt is announcing their new "baby!"

The Go! Baby!


AccuQuilt’s Baby is Here! or Say Hello to GO! Baby™

AccuQuilt’s new arrival brings you a NEW way to GO! The AccuQuilt GO! Baby™ Fabric Cutter is an extension of the GO!® family of products and is an ultra-portable, affordable and adorable fabric cutter for quilters and fabric crafters. The GO! Baby Fabric Cutter has the same cutting performance as the original GO! Fabric Cutter and is just as safe, accurate and fast. At only $139, and with a more compact design, the GO! Baby is perfect for the beginner and occasional quilter. The GO! Baby is compatible with all GO! dies except for 10" x 10" and 10" x 24" dies.

Key features and benefits:
- Consistent, accurate cuts—up to 6 layers at a time
- 90% faster than traditional cutting
- Lightweight—only 8 pounds
- Create perfect appliqué in the turn of a handle
- Reduce fabric waste
- No cut fingers or sore backs
- Create endless design options
- Minimal space needed for storage
- Portable—no electricity or batteries needed

10 New GO! Dies
GO! Baby™ is bringing with it ten new die designs featuring many of our most requested dies such as a smaller tumbler, a cat and a dog. Also available are multiple appliqué flowers and three sizes of equilateral triangles that correspond with the current hexagon die. In addition, a new 2 1/2" strip cutter, has been designed to fit the GO! Baby's smaller size. All dies are compatible with both the GO!® and GO! Baby™ fabric cutters.

(notice those fabrics -- I spy some Park Slope and Meadowsweet)

It's got a carrying case....

Some pretty new dies....


And I must admit, it's really cute.

Everything's available for pre-order at AccuQuilt's site.


A few days ago, when I mentioned that AccuQuilt was "expecting," a friend of mine quipped, "maybe they're lowing the price so I can actually afford it!"

Well, for those of us who fall in to the single-income-SAHM category, that's exactly what they did.

My "professional" opinion -- 

Having used a Go! and knowing the ups and downs of how they work, I would definitely have put this on my Christmas list.

I'm working on finishing up my review for a giveaway.  Yes, that and about a million other things.  But stay tuned. :)

Wednesday, September 15, 2010

Tula Pink for Olivia Violet

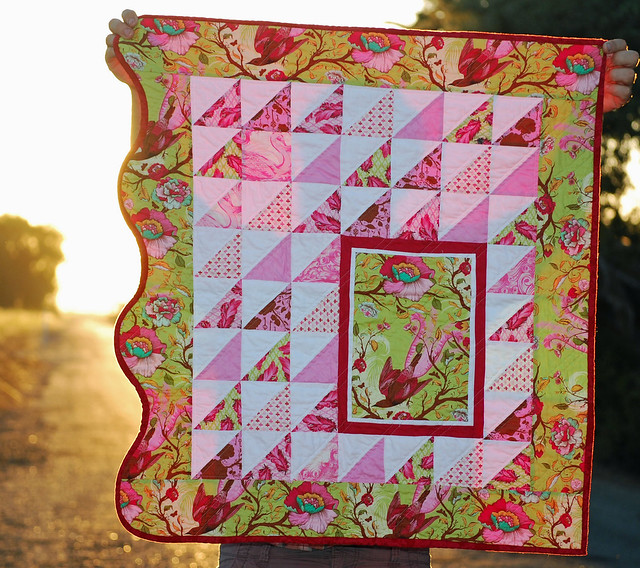
Pin It This is my Friday Sew & Tell for amylouwho!


When my friend from college, Erin, found out that baby #3 was a girl, I knew I wanted to make her a quilt.

Her shower was last weekend, and though sadly, I didn't get to go, I did get to show her a picture. :)

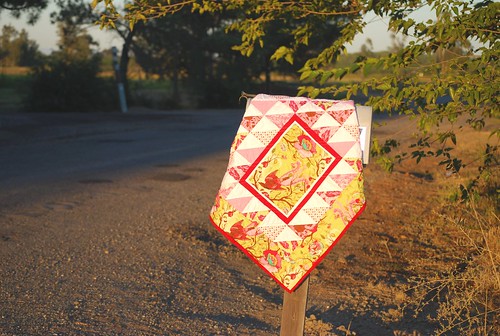
I promised you all a full process write-up, and here it is (the quilt and the write-up)

tula pink for Olivia Violet

Here's how I did it.

I had a Plume FQ bundle... so I pulled out the pinks, and left them folded as they come (I think I had to iron out a couple of them). 

I put it on the 4 1/2" square section of the die that came with the Go! cutter.

go in action

After wheeling it through...

go in action

...I had a lovely pile of 4 1/2" squares.  

cut with go!

A few of them were a tiny bit off where the fabric folded, but they were close enough, and I didn't have to do any prepping of the fabric (which was nice). :)  Using the pre-folded fat quarters really wasn't technically enough seam allowance, but to save time, I'd probably still do it again, and just adjust my seam allowance if necessary, for the pieces that were folded too small to cover the 4 1/2" die.

While I was making this quilt, I discovered one of my favorite features of the Go!

When cutting, I could fold up one side, and use my cutting mat. (Those are chubby star four-patch strips to the right)

the go in action

And while I was pressing, I folded up the other side to keep it out of the way.

go in action

Very handy.

For my white squares, I had cut 5" x WOF strips, and folded them so they were six layers of fabric deep.  It is a little harder to crank through six strips than four; however not as hard as using the ruler and rotary cutter on the cutting mat.

A couple blog friends had asked me about the accuracy of the squares.  Because I didn't have enough seam allowance for my pinks to give an accurate assessment, I decided to check with the whites, where I did have enough overlap.

I had two of my squares (out of 24) that were 4 3/8" instead of 4 1/2".  All the rest were a perfect 4 1/2" square.  Why those two weren't, I do not know, and should have paid better attention to what position they were in the cutting stack.

________________________________________

The inspiration:
Tula Pink for Olivia Violet

  • This little girl will be named "Olivia Violet Cosette."  So I had to go with Tula Pink... 'cause Pink and purple were always my favorite colors growing up.  Plume, with its little Fleur d' Lis, also emphasized the Parisian in her "Cosette."  (Yes, I was sad that Parisville wasn't available yet)
  • Olivia's room is hot pink and watermelon green... this fabric fit that scheme beautifully.
  • Olivia's mama is a very talented singer and song-writer; I figured her daughter might have a little bit of diva...so some glamour was a must.
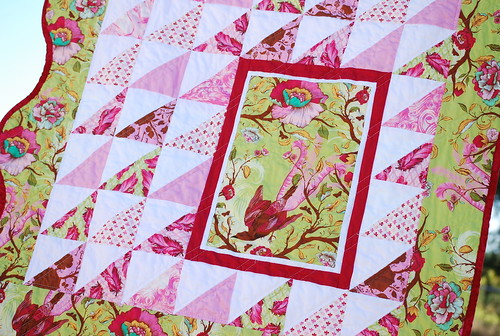
  • Tula herself gave some of the inspiration, with this quilt design...


To start, I had some simple HSTs (half-square triangles), but wasn't sure how I was going to lay them out.  

Plume WIP

I decided to keep them all the same direction, and I added the little framed section because I wanted to put a piece of art in the middle (off to the side actually).

tula pink for Olivia Violet

I moved it off to the side because to me, it balanced the symmetry of the HSTs by being a bit asymmetrical (that's what I was thinking at least).  

The scalloped edge is that little bit of diva I was talking about.  I did it by putting a glass lid on the edge and tracing the edge in and out.

Olivia's label

For the quilting, I decided on simply echoing the movement of the triangles with long, diagonal straight lines on either side of the triangle seams.  I probably should have quilted some vertical lines too, but I'm happy with this look overall, and I was really excited to finish it.

__________________________________

tula pink for Olivia Violet

What I love about this quilt:
  • All those glorious pinks
  • The way the white anchors the design
  • The interplay of the really strong, masculine triangles, with the grandiose florals, and feminine curve in the border
  • The cute label (done with a couple selvage edges so the name of the fabric line and those cute little Fleur d' Lis could be shown off.)
  • Pretty much everything.


What I don't love about this quilt:
  • I'm not sure how I feel about the backing (it's a hot pink flannel from JoAnn's... it was on sale, and hey -- we're on a budget)
DSC_0902
  • I'm also not sure if I made the right binding choice.  I kind of wish I'd have gone with a solid green.  The binding is machine stitched, done on the bias, like in this tutorial.  With the bias binding, it was really easy to get around those curved edges.
  • That's about it. :)


(Oh, and Steiger's usually sleeping while I do my photo shoots, but sometimes he's not.  This is the kind of thing he does on those days). :)

what Steiger does while Mommy takes pictures

DSC_0896


LinkWithin

Related Posts with Thumbnails