Making star points.
This is quite possibly the most boring step (in my opinion) of the quilt-along (part of why I wanted to give you some gratification of seeing blocks come together last week)
They're in the flickr pool if you're interested. :)
Now that you've figured out a good size for your star points, we're going to make a whole lot more.
In case you've forgotten, Directions for how to do those star points are in this post.
Put those contrast star points on top of 2 1/2" squares, and sew diagonal to diagonal. It doesn't matter which corner they're in if you're doing squares, because you can always rotate them in to place.
______________________________
The math:
To figure out how many star points you need to make, multiply the number of chain blocks from this chart by eight. (So I need to make 400 again)
Chubby Star Quilt Along Information
Throw | Twin | Queen/Full | King | Cal King | |
Dimensions | 70” x 78” | 62” x 86” | 86” x 94” | 102” square | 98” x 108” |
Block layout | 7 x 8 | 6 x 9 | 9 x 10 | 11 x 11 | 9 x 11 |
Snowball blocks | 28 | 27 | 45 | 60 | 49 |
Chain blocks | 28 | 27 | 45 | 61 | 50 |
Here's the deal:
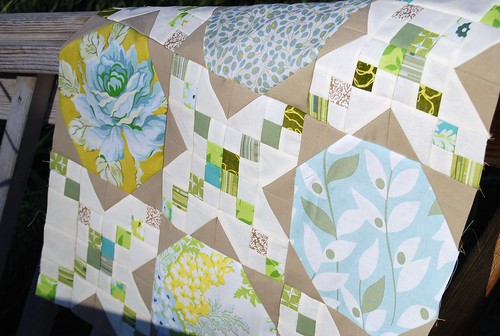
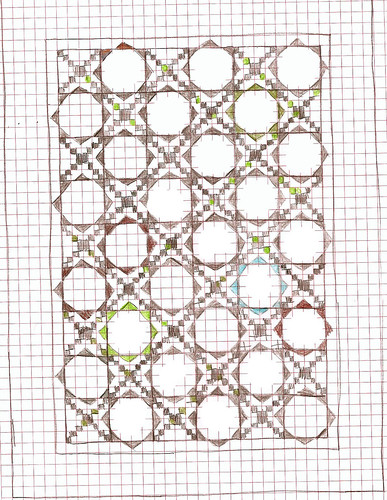
You've seen this picture many times already, but have you noticed that some of the side and corner blocks are different?
I planned to use these first nine blocks on the top left corner of my massive quilt, so I intentionally used background squares without points in those blocks...we don't want any errant star points floating around after all.
Please plan accordingly for your quilt size.
Here's a diagram to see block layout (this one is twin), so you get what I'm talking about.
Also, looking at Karen's EQ Chubby Stars quilts can help you see for sure.
I don't plan to put together my chain blocks this week (I think 400 star points will be enough), but I do plan to match them in to pairs so they're ready to join my four-patches, rather than left just as the points (like this).
If you want to work ahead though -- please take note of your border chain blocks...and leave a top and side undone for the four corners, and a side (doesn't matter which one because these blocks are symmetrical) for the side border blocks. You'll use most or all of the extra points you made when you finish your quilt (so save those extra star points somewhere safe -- I plan to finish all my chubby stars).
If you have questions, ask them here or in the flickr group. :)
(Come back later for a post on what I got distracted by this week.) :)


Ready to get to work! I saw your feature on Amy's blog, you fancy thing you!
ReplyDeleteThank you for the 3rd step. I'm still behind but working on it!
ReplyDeleteThank you for the directions that I didn't wait for and thanks for the shout out for the bake shop. I just love this quilt! Oh, and I saw you over at Amy's blog. So fun!!
ReplyDelete